This is the first in what may become an occasional tutorial in the basics of digital imagery and manipulation.
Before we begin I have to state that this post wouldn't be possible without the excellent blog by David Apatoff.
Illustration Art. --> http://illustrationart.blogspot.com/
It is a really good resource and discussion area for a wide range on illustration topics. I posted a simple trick back in early March to help improve the quality of a few photos on his blog. http://illustrationart.blogspot.com/2011/03/one-lovely-drawing-part-35.html
David mentioned that he didn't really have time to learn the ins and outs of Photoshop,my advice was well received and so I determined to give a few more little nuggets of help.
The overall quick-image-once-over would take me only about 5- 6 seconds per image but I thought I could break that down for you all. Once you understand what is going on, anyone can easily do this process to every image with only a few quick-key shortcuts in a few seconds.
A recent post has provided the perfect example to use some really quick techniques in Photoshop to improve scanned imagery of printed material and paintings. I know that many people might already use some or all of these techniques but may not know the whys and wherefores of what is actually happening. So here I will try to lay it out as simply and clearly as I can. I am only skimming over this stuff and showing you very quick and easy tricks.
If you are really interested you can look into it in much more detail in any photoshop book or online.
----------------
My Ode to An ODE to CONTRAST (Verse 5)
All the original imagery in this post come from the Illustration Art Blog.
http://illustrationart.blogspot.com/2011/04/ode-to-contrast-verse-5.html
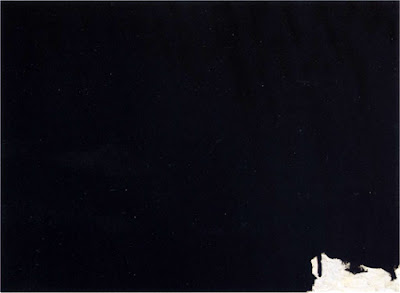
The first image is a painting by Robert Motherwell. It should provide a perfect example of what we are talking about here.
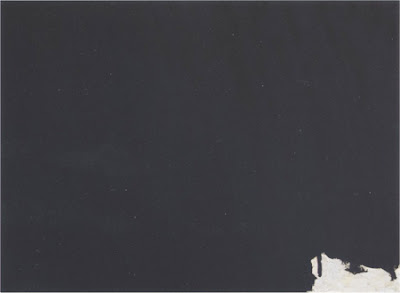
I would assume that Motherwell used black paint to for the majority of this painting, in the post on the blog the image appears as a vast dark grey area with a small light grey area bottom right.
The problem is that either the original painting has faded or the reproduction or scan isn't showing the right contrast. Something of the contrast has been lost and it is an important aspect as we are talking about contrast, and more specifically extreme contrast.
This sort of thing happens constantly in digital imagery and it is easily fixed. I find the quickest way to fix it is by using LEVELS in photoshop. Levels is found in the Image/Adjustment menu in the top menu.
It can also be brought up using the hot-keys (Command/Control) L. Levels brings up a little panel with Input Levels and Output Levels. We are only going to be concerned with Input Levels.
Input Levels are presented as a graph, don't panic, it is a pretty simple graph, in fact it's not called a graph but a Histogram.
To understand levels you need to understand this histogram, what it shows is how much of each tone is in the image. Actual black is where the little black triangle is on the left and white is on the right with shades of grey across the middle with mid-grey at the triangle in the centre.
The histogram indicates how much of a particular tone is in the image, the higher the bump the more of that tone.
So what you would expect with the Motherwell painting is most of the graph action on the left (black) side and a little bit of graph action on the right(white side) but what happens when we look at the graph for this image?
Well, as you can see there are a lot of tones on the darker end and a little bump in the lighter tones area, and an inexplicable tiny lump to the left of the midtone arrow. Notice that their is a gap between the black arrow and the darker tone, this is the difference between the black shown and actual black. There is so much of this dark grey that it is not so much a bump as a vertical column.

Now to adjust this image lets drag the black triangle to where the black should be, so drag it in, then drag the white triangle in to the left. Drag the white one all the way to the little bump. Hopefully you can see the image while you are doing this and have preview turned on.

The final histogram should look like this after dragging.
If you like you can adjust the mid-tone triangle to you liking, moving it left will make all the mid-tones lighter and moving it right will darken them, usually it only needs a very slight adjustment.
Now that should be more like the original painting.
OK, that was pretty easy being a high contrast black and white image, lets try it with a colour one.
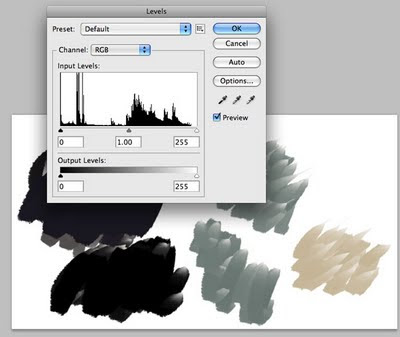
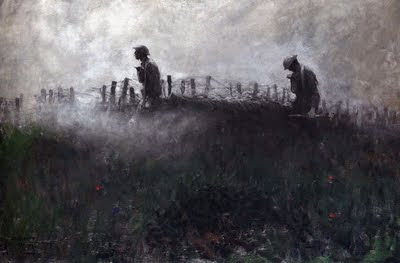
This Harvey Dunn image is fantastic with its smokey-murkyness.
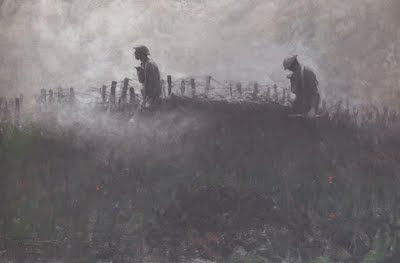
I think that maybe the actual painting may have discoloured a little over time as well as a lot of the contrast being lost in the scanning. For this one we will speed things up by using the auto-levels function. There is a danger using auto anything but it can still usually provide some improvement on almost any scanned image or photo provided you pay attention to the and are sympathetic to the image content.
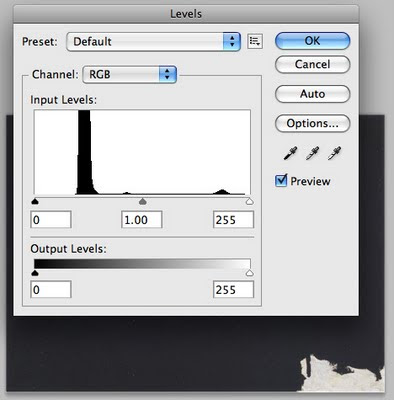
Drag the image onto a document in photoshop and bring up Levels.

Notice that everything is once again in the middle with no real blacks or whites. At this point you could drag the two end triangles in (as before) and then adjust the mid-tone to your liking, but we are going to use the Auto button.
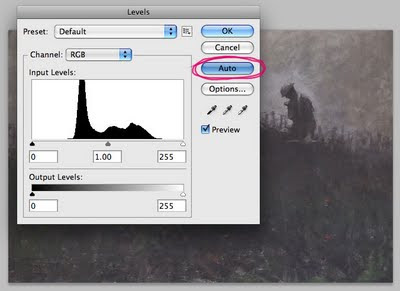
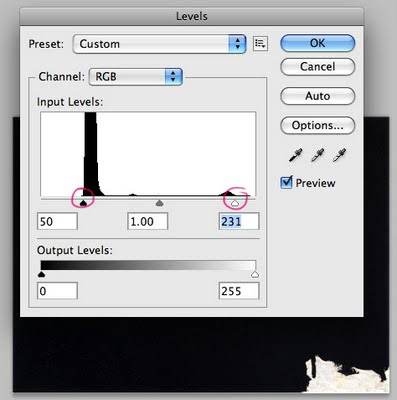
The Auto button assumes there is a black point and a white point and adjusts everything accordingly. There is a great danger in this assumption, especially in paintings where it is possible the artist never used actual black or white, maybe the picture is very high-keyed, etc. In this case Auto levels probably won't be the solution and you may need to carefully use levels manually. In illustration meant for reproduction I often find that there are in fact black and white points in the image.

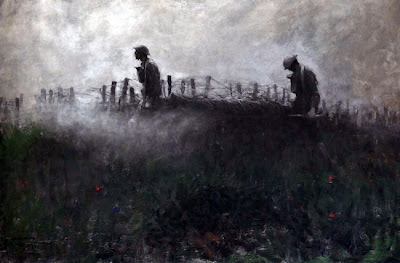
What the auto-levels does here is typical as it is a bit too heavy handed and something is lost in the smokey-murkyness of the tonal range. Notice that it has also brought out some of the colours in the grass and few flowers.
To fix this use the Fade function. It can be found under the Edit/Fade menu in the top menu, or use the hot-key (Command/Control) F.
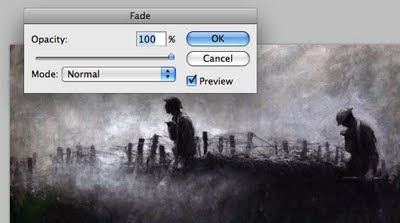
The fade panel lets you fade back the last effect, in this case levels, as you pull it back the image returns to its previous appearance. Fade is good to use to pull back on all sorts of things, try it.
I found that about 80% seemed pretty good.
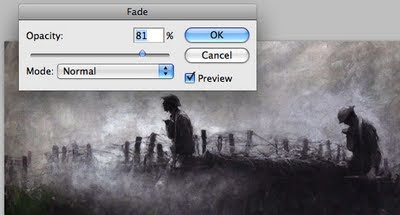
Done, now compare this image to the original Dunn.
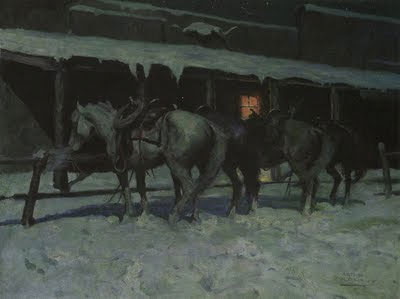
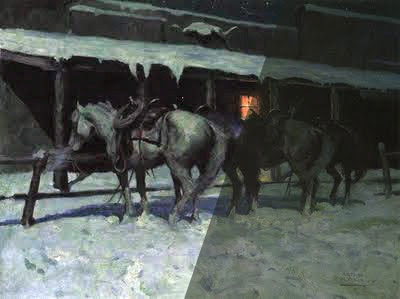
Here I have tried the same thing to the Mitchell painting and you can see the difference in the combined image.
I hope this has made sense and been of some help to David and anyone else using a range of imagery in their blogs or anywhere else.
Regards,
ROBin


